Table of Contents
In the fast-paced world of web development, creating dynamic, reactive interfaces has become a crucial skill. Yet, many developers find themselves caught between the complexity of JavaScript frameworks and the simplicity of server-side rendering. Enter Laravel Livewire – a powerful tool that bridges this gap, offering a seamless blend of reactivity and server-side logic.
Imagine building interactive UIs without writing a single line of JavaScript. Sounds too good to be true? That’s the magic of Livewire. It empowers developers to craft responsive, real-time experiences using familiar PHP syntax, all while leveraging Laravel’s robust ecosystem. But mastering Livewire isn’t just about writing code; it’s about unlocking a new paradigm in web development that can dramatically enhance productivity and user experience. 🚀
This comprehensive guide will take you on a journey from understanding the basics of Laravel Livewire to implementing advanced techniques. We’ll explore everything from setting up your environment and creating your first component to optimizing performance and testing. Whether you’re a seasoned Laravel developer or just starting out, this deep dive into Livewire will equip you with the knowledge to build dynamic, reactive interfaces that captivate users and streamline your development process.

Understanding Laravel Livewire
What is Laravel Livewire?
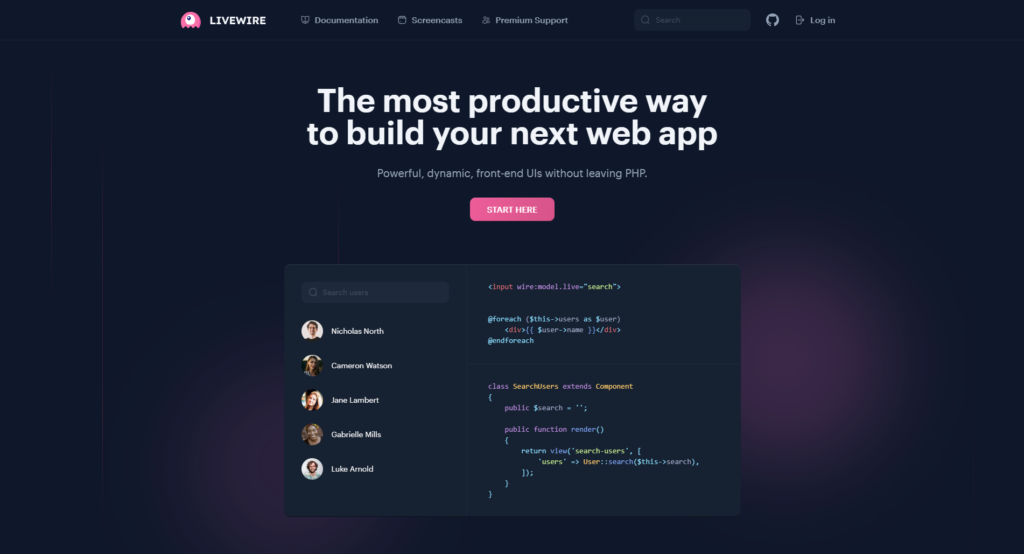
Laravel Livewire is a powerful full-stack framework for Laravel that simplifies the process of building dynamic, reactive interfaces. It allows developers to create interactive user interfaces without writing JavaScript code, leveraging the power of PHP and Laravel’s ecosystem.
Livewire operates by combining the server-side rendering capabilities of Laravel with the reactivity of modern front-end frameworks. This unique approach enables developers to create rich, interactive experiences while maintaining the simplicity and familiarity of Laravel development.
How Livewire differs from other front-end frameworks
Unlike traditional JavaScript-based front-end frameworks, Livewire takes a server-first approach to building dynamic interfaces. Here’s a comparison of Livewire with other popular front-end frameworks:
| Feature | Livewire | Vue.js | React |
|---|---|---|---|
| Language | PHP | JavaScript | JavaScript |
| Learning Curve | Low | Moderate | Moderate to High |
| Server-Side Rendering | Built-in | Requires additional setup | Requires additional setup |
| State Management | Automatic | Manual (Vuex) | Manual (Redux, Context API) |
| Backend Integration | Seamless | Requires API | Requires API |
| Full-Stack Capabilities | Yes | No | No |
Livewire’s approach allows developers to leverage their existing Laravel knowledge and skills, reducing the need to context-switch between back-end and front-end technologies.
Key features and benefits
Laravel Livewire offers several key features and benefits that make it an attractive choice for building dynamic interfaces:
- Simplicity: Write PHP code to create interactive UIs without the need for complex JavaScript frameworks.
- Real-time reactivity: Automatically update the DOM when data changes, providing a seamless user experience.
- Laravel integration: Seamlessly integrates with Laravel’s ecosystem, including authentication, validation, and Blade templating.
- Full-stack solution: Eliminates the need for a separate API layer, streamlining development and reducing complexity.
- Progressive enhancement: Gracefully degrades for users with JavaScript disabled, ensuring accessibility.
- Security: Leverages Laravel’s built-in security features, reducing the attack surface compared to traditional SPA architectures.
- Testing: Easily test components using Laravel’s testing tools, improving code reliability and maintainability.
Some additional benefits include:
- Reduced development time
- Improved performance through selective DOM updates
- Simplified state management
- Easier debugging and error handling
With these features and benefits, Laravel Livewire empowers developers to create modern, reactive web applications while maintaining the simplicity and productivity of Laravel development.
Now that we have a solid understanding of Laravel Livewire and its advantages, let’s explore how to set up your Livewire environment and start building dynamic interfaces.

Setting Up Your Livewire Environment
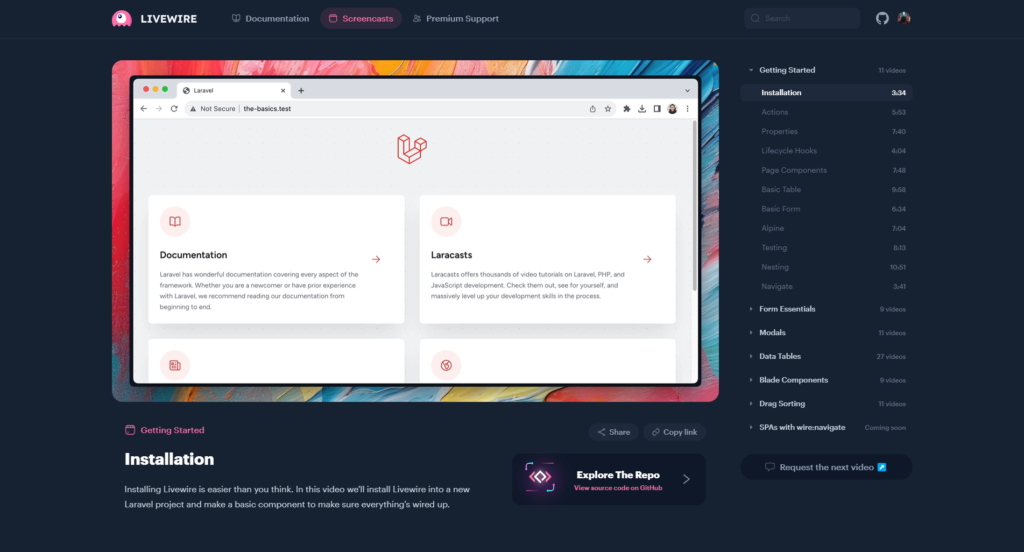
Before diving into the world of Laravel Livewire, it’s crucial to set up your development environment correctly. This section will guide you through the essential tools, configuration steps, and installation process to ensure a smooth start with Livewire.
A. Essential tools and extensions
To maximize your productivity when working with Laravel Livewire, consider using the following tools and extensions:
- Code editor: Visual Studio Code or PHPStorm
- Browser: Chrome or Firefox with developer tools
- Terminal: iTerm2 (Mac) or Windows Terminal (Windows)
- Version control: Git
Recommended VS Code extensions:
| Extension Name | Purpose |
|---|---|
| Laravel Artisan | Run Artisan commands from VS Code |
| Laravel Blade Snippets | Blade syntax highlighting and snippets |
| PHP Intelephense | Advanced PHP code intelligence |
| Livewire Language Support | Syntax highlighting for Livewire components |
B. Configuring Livewire components
Livewire components are the building blocks of your reactive interfaces. To configure them effectively:
- Create a dedicated directory for Livewire components:
- Typically located at
app/Http/Livewire
- Typically located at
- Set up component namespacing:
- Add
App\Http\Livewireto yourcomposer.jsonfile
- Add
- Configure component auto-discovery:
- Enable in
config/livewire.php
- Enable in
C. Installing Livewire in your Laravel project
Now that your environment is prepared, let’s install Livewire:
- Open your terminal and navigate to your Laravel project directory.
- Run the following command to install Livewire via Composer:
composer require livewire/livewire - Include Livewire assets in your layout file:
- Add
@livewireStylesin the<head>section - Add
@livewireScriptsbefore the closing</body>tag
- Add
- Publish Livewire configuration (optional):
php artisan livewire:publish --config
This installation process integrates Livewire seamlessly into your Laravel application, allowing you to start building dynamic, reactive interfaces right away.
With your Livewire environment now set up, you’re ready to create your first Livewire component and explore the power of reactive web development within the Laravel ecosystem.
Creating Your First Livewire Component
Creating your first Livewire component is a crucial step in mastering Laravel Livewire. This section will guide you through the process, covering the basic component structure, implementing component logic, rendering components in views, and handling user interactions.
Basic Component Structure
A Livewire component consists of two main parts: a PHP class and a Blade template. Let’s break down the structure:
// app/Http/Livewire/Counter.php
namespace App\Http\Livewire;

use Livewire\Component;

class Counter extends Component
{
    public $count = 0;

    public function render()
    {
        return view('livewire.counter');
    }
}
<!-- resources/views/livewire/counter.blade.php -->
<div>
<h1>{{ $count }}</h1>
<button wire:click="increment">+</button>
</div>This structure forms the foundation of a Livewire component, separating logic and presentation.
Implementing Component Logic
Component logic is implemented in the PHP class. Here’s how you can add methods and properties:
class Counter extends Component
{
    public $count = 0;

    public function increment()
    {
        $this->count++;
    }

    public function decrement()
    {
        $this->count--;
    }

    public function render()
    {
        return view('livewire.counter');
    }
}
Public properties like $count are automatically synced between the backend and frontend, enabling reactivity.
Rendering Components in Views
To render a Livewire component in your Laravel views, use the @livewire directive:
@extends('layouts.app')

@section('content')
    @livewire('counter')
@endsection
Alternatively, you can use the <livewire:counter /> tag syntax for a more HTML-like approach.
Handling User Interactions
Livewire provides several directives for handling user interactions. Here’s a comparison of common directives:
| Directive | Description | Example |
|---|---|---|
| wire:click | Handles click events | <button wire:click="increment">+</button> |
| wire:submit | Handles form submissions | <form wire:submit.prevent="save"> |
| wire:model | Two-way data binding | <input wire:model="name" type="text"> |
| wire:keydown | Handles keydown events | <input wire:keydown.enter="search"> |
These directives allow you to create interactive components without writing JavaScript.
Now that we’ve covered the basics of creating a Livewire component, let’s explore how to leverage Livewire’s reactivity to build more complex and dynamic interfaces.
Mastering Livewire’s Reactivity
Now that we’ve covered the basics of creating Livewire components, let’s dive into the heart of what makes Livewire truly powerful: its reactivity system. Mastering this aspect is crucial for building dynamic, responsive interfaces that update in real-time without full page reloads.
Managing Component State
At the core of Livewire’s reactivity is the concept of component state. This refers to the data that can change and trigger updates in your component. In Livewire, public properties of your component class represent this state.
class Counter extends Component
{
    public $count = 0;

    public function increment()
    {
        $this->count++;
    }
}
In this example, $count is part of the component’s state. When it changes, Livewire automatically re-renders the component, reflecting the new state in the browser.
Utilizing Livewire’s Lifecycle Hooks
Livewire provides several lifecycle hooks that allow you to tap into different stages of a component’s lifecycle. These hooks are crucial for managing side effects and performing actions at specific points during the component’s existence.
Here’s a table summarizing key lifecycle hooks:
| Hook | Description | Use Case |
|---|---|---|
| mount() | Called when component is first initialized | Set initial state |
| hydrate() | Called on subsequent requests | Prepare component after hydration |
| updating() | Before a property is updated | Validate or modify data before update |
| updated() | After a property has been updated | Perform actions based on new state |
| rendering() | Before the component is rendered | Last-minute checks before render |
| rendered() | After the component has been rendered | Perform actions on rendered DOM |
Implementing Data Binding
Data binding in Livewire allows for seamless synchronization between your component’s state and the DOM. This is achieved through wire:model directive.
<input type="text" wire:model="name">
<p>Hello, {{ $name }}!</p>
Livewire offers different modifier options for data binding:
- wire:model.lazy: Updates the state only when the input loses focus
- wire:model.debounce.Xms: Waits X milliseconds after the last input to update the state
- wire:model.defer: Defers updating the state until a form submission
Understanding Real-time Updates
One of Livewire’s most powerful features is its ability to provide real-time updates. When a component’s state changes, Livewire automatically sends a request to the server, updates the component, and patches the DOM with the changes.
To optimize performance, Livewire uses a smart-diffing algorithm to update only the parts of the DOM that have changed. This approach significantly reduces the amount of data transferred between the client and server.
For more complex scenarios, you can use the wire:poll directive to periodically refresh a component:
<div wire:poll.5s>
    Current time: {{ now() }}
</div>
This example updates the current time every 5 seconds without a full page reload.
By mastering these aspects of Livewire’s reactivity, you’ll be well-equipped to create dynamic, responsive interfaces that provide a seamless user experience. Next, we’ll explore how to leverage these concepts to build dynamic forms with Livewire.
Building Dynamic Forms with Livewire
Dynamic forms are a cornerstone of interactive web applications, and Laravel Livewire excels in this area. By leveraging Livewire’s reactive capabilities, developers can create responsive and user-friendly forms that provide real-time feedback and enhance the overall user experience.
Real-time validation techniques
Livewire offers powerful real-time validation capabilities that allow for instant feedback as users input data. This approach significantly improves form usability and reduces submission errors. Here are some key techniques:
- Use the
$rulesproperty to define validation rules - Implement the
updatedmethod for field-specific validation - Utilize Livewire’s
wire:modeldirective for two-way data binding
class ContactForm extends Component
{
    public $name;
    public $email;

    protected $rules = [
        'name' => 'required|min:3',
        'email' => 'required|email',
    ];

    public function updated($propertyName)
    {
        $this->validateOnly($propertyName);
    }
}
Displaying success and error messages
Effective communication of form status is crucial for user experience. Livewire simplifies the process of displaying validation errors and success messages:
- Use the
$errorsbag to display validation errors - Implement flash messages for successful form submissions
- Utilize Livewire’s
wire:dirtydirective to indicate unsaved changes
| Message Type | Implementation |
|---|---|
| Validation Errors | @error('field') <span class="error">{{ $message }}</span> @enderror |
| Success Messages | session()->flash('message', 'Form submitted successfully!'); |
| Unsaved Changes | <span wire:dirty>You have unsaved changes</span> |
Handling form submissions
Livewire streamlines the form submission process, allowing for seamless handling of user input:
- Define a submit method in your Livewire component
- Use the
wire:submit.preventdirective to handle form submission - Implement error handling and success responses
public function submit()
{
    $this->validate();

    // Process form data
    // ...

    session()->flash('message', 'Form submitted successfully!');
    $this->reset();
}
Creating form components
To enhance reusability and maintain a clean codebase, consider creating dedicated form components:
- Generate a new Livewire component for each form
- Implement form-specific logic within the component
- Use Livewire’s component composition for complex forms
php artisan make:livewire ContactFormBy following these best practices, developers can create dynamic, responsive forms that provide an excellent user experience while maintaining clean and maintainable code. Livewire’s reactive nature ensures that forms remain performant and scalable, even as application complexity grows.
Now that we’ve covered building dynamic forms with Livewire, let’s explore how to optimize performance in Livewire applications to ensure your forms and other components run smoothly.
Optimizing Performance in Livewire Applications
As Laravel Livewire applications grow in complexity, optimizing performance becomes crucial for delivering a smooth user experience. This section explores key strategies to enhance the efficiency of your Livewire components and ensure your application remains responsive under heavy loads.
Caching techniques for Livewire components
Implementing effective caching strategies can significantly reduce server load and improve response times. Livewire offers several built-in caching mechanisms:
- Component Caching: Use the
cachemethod to store computed properties or expensive database queries. - Render Caching: Employ the
@cachedirective to cache entire component views. - Data Caching: Utilize Laravel’s cache system for frequently accessed data.
Here’s a comparison of these caching techniques:
| Technique | Use Case | Implementation |
|---|---|---|
| Component Caching | Expensive computations | public function getExpensiveProperty(){ return cache()->remember('key', $seconds, fn() => $this->expensiveOperation()); } |
| Render Caching | Static or rarely changing views | @cache($this->users) |
| Data Caching | Frequently accessed data | Cache::remember('users', $seconds, fn() => User::all()); |
Efficient data querying strategies
Optimizing database queries is essential for Livewire performance. Consider the following strategies:
- Use eager loading to avoid N+1 query problems
- Implement query scopes for frequently used filters
- Utilize database indexes for faster lookups
- Employ query caching for repetitive queries
Implementing pagination
Pagination is crucial when dealing with large datasets. Livewire provides built-in support for pagination:
use Livewire\WithPagination;

class UserList extends Component
{
    use WithPagination;

    public function render()
    {
        return view('livewire.user-list', [
            'users' => User::paginate(10)
        ]);
    }
}
This approach ensures that only a subset of data is loaded at a time, reducing memory usage and improving load times.
Lazy loading components
Lazy loading allows you to defer the loading of Livewire components until they’re needed. This technique can significantly improve initial page load times, especially for complex applications with multiple components.
To implement lazy loading:
- Use the
@livewiredirective with thelazyattribute in your Blade templates. - Implement skeleton loaders or placeholders to improve perceived performance.
Example:
@livewire('user-dashboard', ['userId' => $user->id], key($user->id), lazy)By implementing these optimization techniques, you can ensure that your Livewire applications remain fast and responsive, even as they scale. Remember to profile your application regularly and focus on optimizing the most resource-intensive components for the best results.
Now that we’ve covered performance optimization, let’s explore some advanced Livewire techniques to further enhance your application’s capabilities.
Advanced Livewire Techniques
As we delve deeper into Laravel Livewire, let’s explore some advanced techniques that will elevate your development skills and enable you to create more sophisticated, efficient, and feature-rich applications.
Building Custom Livewire Directives
Custom Livewire directives allow developers to extend Livewire’s functionality and create reusable pieces of logic. These directives can significantly streamline your code and enhance the readability of your Blade templates.
To create a custom directive:
- Define the directive in a service provider
- Implement the logic in a separate class
- Use the directive in your Blade templates
Here’s an example of a custom directive that formats a date:
Livewire::directive('formatDate', function ($expression) {
    return "<?php echo ($expression)->format('Y-m-d H:i:s'); ?>";
});
Integrating with Third-Party JavaScript Libraries
Livewire plays well with JavaScript libraries, allowing you to leverage their power while maintaining the simplicity of Livewire components. Here’s a comparison of integration approaches:
| Approach | Pros | Cons |
|---|---|---|
| Alpine.js | Seamless integration, lightweight | Limited functionality for complex scenarios |
| Vue.js | Powerful, extensive ecosystem | Steeper learning curve, potential conflicts |
| jQuery | Wide browser support, extensive plugins | Outdated, performance overhead |
To integrate a library, you typically:
- Include the library in your Blade template
- Initialize the library in a Livewire component’s
mount()orrendered()lifecycle hooks - Use Livewire’s
wire:ignoredirective to prevent conflicts
Creating Reusable Livewire Traits
Traits in Livewire offer a powerful way to share functionality across components. They can encapsulate common logic, properties, and methods, promoting code reuse and maintainability.
To create a reusable trait:
- Define the trait in a separate PHP file
- Include properties and methods that are common across components
- Use the
usekeyword to incorporate the trait in your Livewire components
Implementing File Uploads
Livewire simplifies file uploads by providing built-in methods and properties. Here’s a step-by-step guide:
- Add a file input to your Blade template
- Use the
wire:modeldirective to bind the input to a property - Validate and store the file in your component’s method
- Optionally, use Livewire’s temporary upload feature for preview functionality
Nesting Components for Complex Interfaces
Nesting Livewire components allows you to build complex, modular interfaces. This approach offers several benefits:
- Improved code organization
- Enhanced reusability
- Better performance through selective updates
To nest components effectively:
- Break down your interface into logical, reusable parts
- Create separate Livewire components for each part
- Use the
@livewiredirective to include child components in parent templates - Implement communication between components using events or shared state
By mastering these advanced Livewire techniques, you’ll be well-equipped to tackle complex web development challenges and create more sophisticated, efficient applications. Next, we’ll explore how to ensure the reliability and correctness of your Livewire components through effective testing strategies.
Testing Livewire Components
Testing is a crucial aspect of developing robust Livewire components. By implementing a comprehensive testing strategy, developers can ensure the reliability and functionality of their dynamic interfaces. Let’s explore the best practices and techniques for testing Livewire components.
Best practices for test-driven development with Livewire
Test-driven development (TDD) is an effective approach when working with Livewire. Here are some best practices to follow:
- Write tests before implementing features
- Focus on component behavior rather than implementation details
- Use descriptive test names that clearly indicate the expected behavior
- Keep tests isolated and independent of each other
- Regularly refactor tests to maintain code quality
Implementing feature tests for Livewire interactions
Feature tests are essential for verifying the functionality of Livewire components within the context of your application. Here’s a step-by-step guide to implementing feature tests:
- Create a new feature test class using Laravel’s testing framework
- Use the
Livewire::test()method to instantiate the component - Simulate user interactions using methods like
call(),set(), andassertSee() - Verify the component’s state and output after each interaction
Here’s an example of a feature test for a simple counter component:
use Livewire\Livewire;
use Tests\TestCase;

class CounterTest extends TestCase
{
    /** @test */
    public function it_increments_counter_on_button_click()
    {
        Livewire::test(Counter::class)
            ->assertSee('0')
            ->call('increment')
            ->assertSee('1');
    }
}
Writing unit tests for components
Unit tests focus on individual methods and properties of Livewire components. They help ensure that each component’s logic functions correctly in isolation. Consider the following best practices:
- Test public methods and properties
- Use mocks for external dependencies
- Test edge cases and error scenarios
- Keep tests small and focused on specific behaviors
Here’s a comparison of unit tests vs. feature tests for Livewire components:
| Aspect | Unit Tests | Feature Tests |
|---|---|---|
| Scope | Individual methods/properties | Entire component behavior |
| Speed | Faster | Slower |
| Dependencies | Mocked | Real |
| Complexity | Lower | Higher |
| Coverage | Detailed | Broad |
Setting up a testing environment
To set up an effective testing environment for Livewire components, follow these steps:
- Configure your
phpunit.xmlfile to include Livewire-specific settings - Create a dedicated test database to avoid affecting your development data
- Use Laravel’s database transactions to reset the database state between tests
- Implement factories for generating test data
- Consider using a continuous integration (CI) pipeline for automated testing
By following these testing strategies and best practices, you can ensure the reliability and maintainability of your Livewire components. Effective testing leads to more robust and error-free dynamic interfaces, ultimately improving the overall quality of your Laravel application.
Conclusion
Laravel Livewire emerges as a powerful tool for developers seeking to create dynamic, reactive interfaces without the complexity of full JavaScript frameworks. By mastering Livewire’s core concepts, from environment setup to advanced techniques and performance optimization, developers can significantly enhance their ability to build modern, responsive web applications.
The journey to mastering Laravel Livewire is an ongoing process of learning and experimentation. As developers continue to explore its capabilities, they’ll discover new ways to leverage this technology in their projects. By staying up-to-date with Livewire’s evolving ecosystem and best practices, developers can ensure they’re always at the forefront of creating exceptional user experiences with Laravel.

